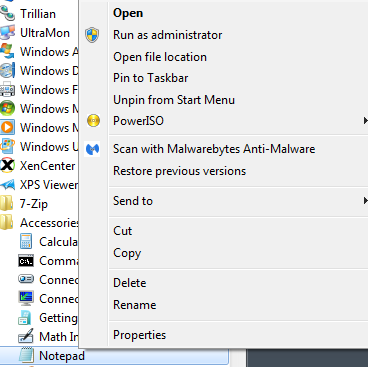
1. In a Windows Based Operating System, you will need to open Notepad and "run as administrator".
This can usually be found in Start Menu -> All Programs -> Accessories -> Notepad, and right-clicking the Icon, and clicking "Run as Administrator"

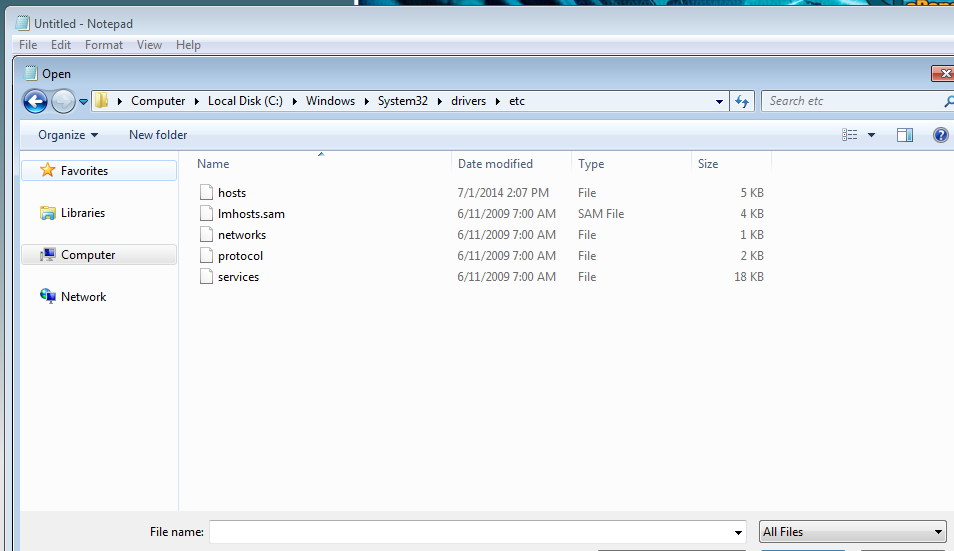
2. Once you have Notepad Open, Click on File -> Open, and then navigate to the location of the HOSTS file, by pasting the below path in the bottom bar.
C:\Windows\System32\drivers\etc\
Note: You need to click the drop-down box on the bottom right of the display box and select "All Files" for the hosts file to be visible.


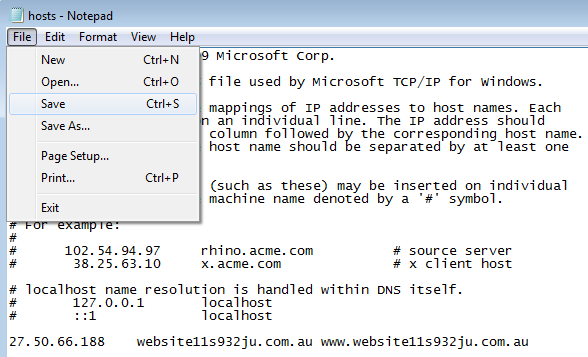
3. With the file open you will see a screen like the image below. You will then need to Add a new Line, for each website you would like to see .
If Servers Australia is assisting in a migration for you, you will most likely have a list of sites to paste to the bottom of this file.
4. In this example, we'll add the domain entry:
27.50.66.188 website11s932ju.com.au www.website11s932ju.com.au

This will bypass DNS and tell your computer to load the website from the IP 27.50.66.188.
5. Now click file -> save.
If you have any browsers open, you will need to close out of them completely and reopen them as some browsers have DNS caching.
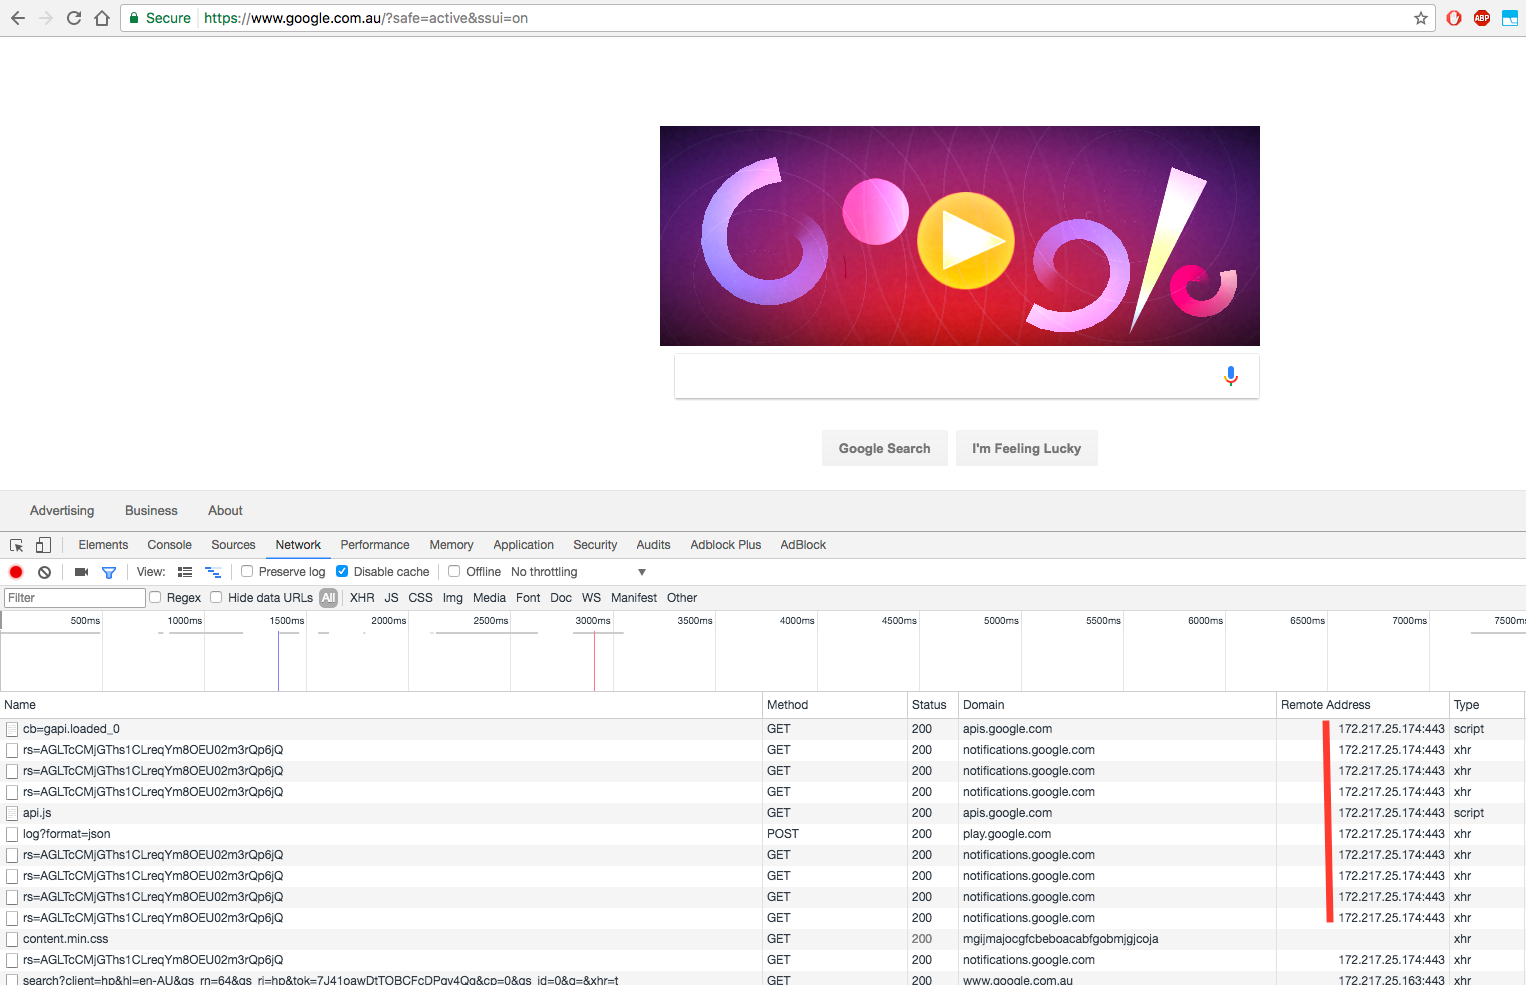
To confirm you are loading the site from the right server, you can use the Developer Tools in Google Chrome or Firefox browsers.
For Chrome, in Developer Tools. Click on the network tab and reload the page.
Then right-click one of the column names and select "Remote Address". This will enable showing the Remote Address column so you can see where requests are loading from:

Now when you visit one of the sites you put in the hosts file, the "Remote Address" column will confirm your loading from the IP set.
Note: This method will only work if you have access to login as a Local Administrator.